Showing posts with label Dessert Alternatives. Show all posts

Healthy Pumpkin Muffins Recipe with Oats and Pecans [Skinny, Wheat-free, Dairy-Free]

Friday 6 November 2015


Autumn is in full swing and so is the pumpkin and winter squashes season! I've been obsessed with these little muffins for breakfast lately and I'm so excited to share this recipe of muffins that are:

♥ healthy
♥ wholesome
♥ nutrient-packed
♥ weight loss friendly
♥ low carb and low GI
♥ low fat
♥ dairy free
♥ wheat free 
♥ refined sugar free
♥ salt free
♥ high in fibre
♥ flourless*
♥ vegan*
♥ simple and easy to prepare
and
♥ soooo yummy!

*I have tried and tested several different ingredient combinations, which I will all reflect in the ingredient list below. So you can pick the one you like the most. ;)

The options are:
 

BASE: 
a) oat flour based or b) completely without flour

ADD-INS:

a) with nuts or b) without nuts

DIET: 

a) vegan or b) vegetarian.

In the meantime, I will tempt you with the preview:

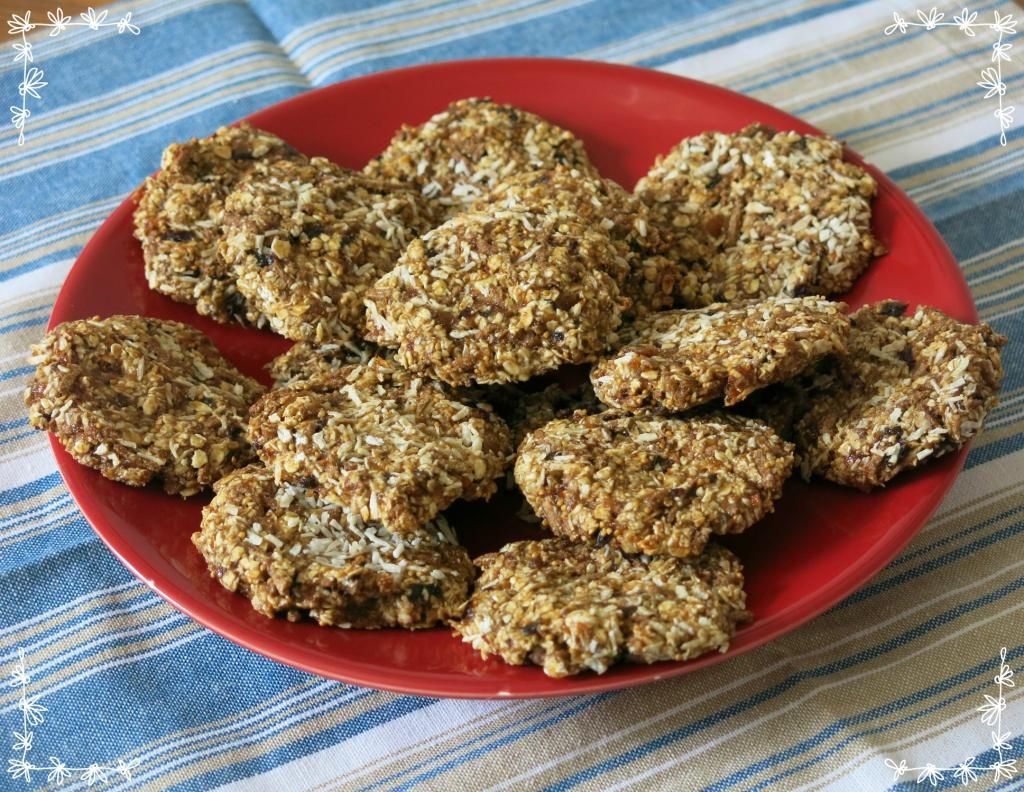
Pumpkin oat muffins (nut-free)


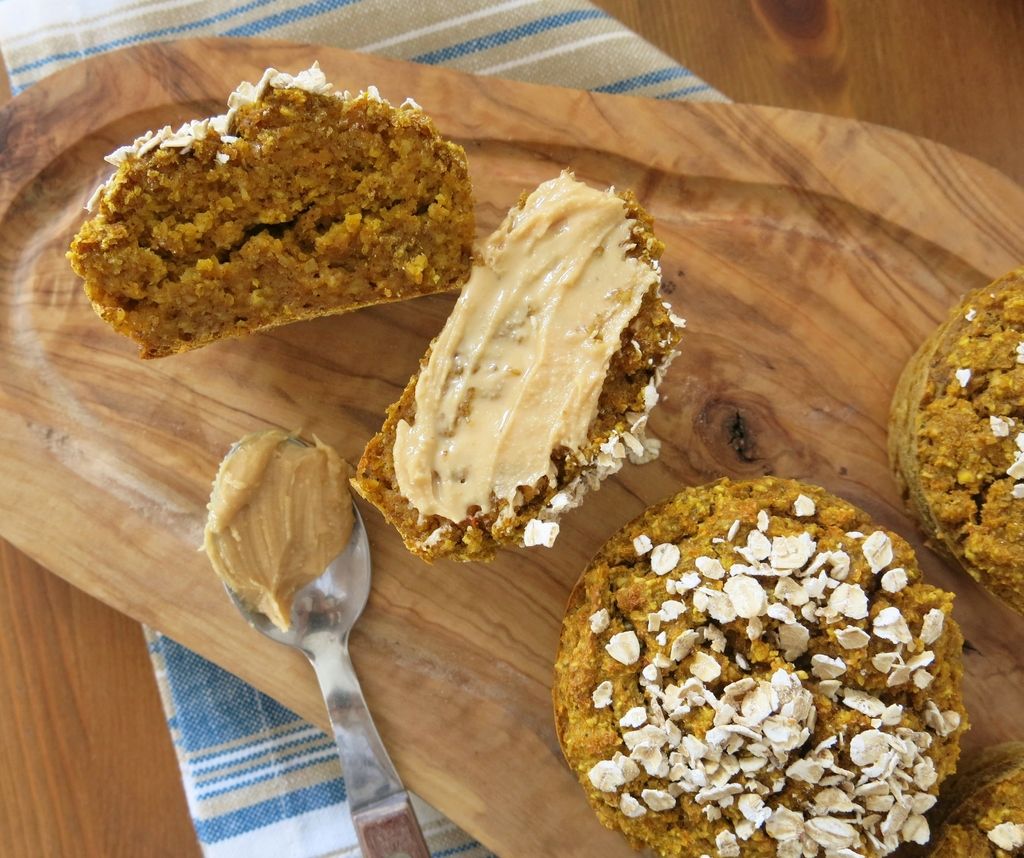
Pumpkin oat muffins with peanut butter
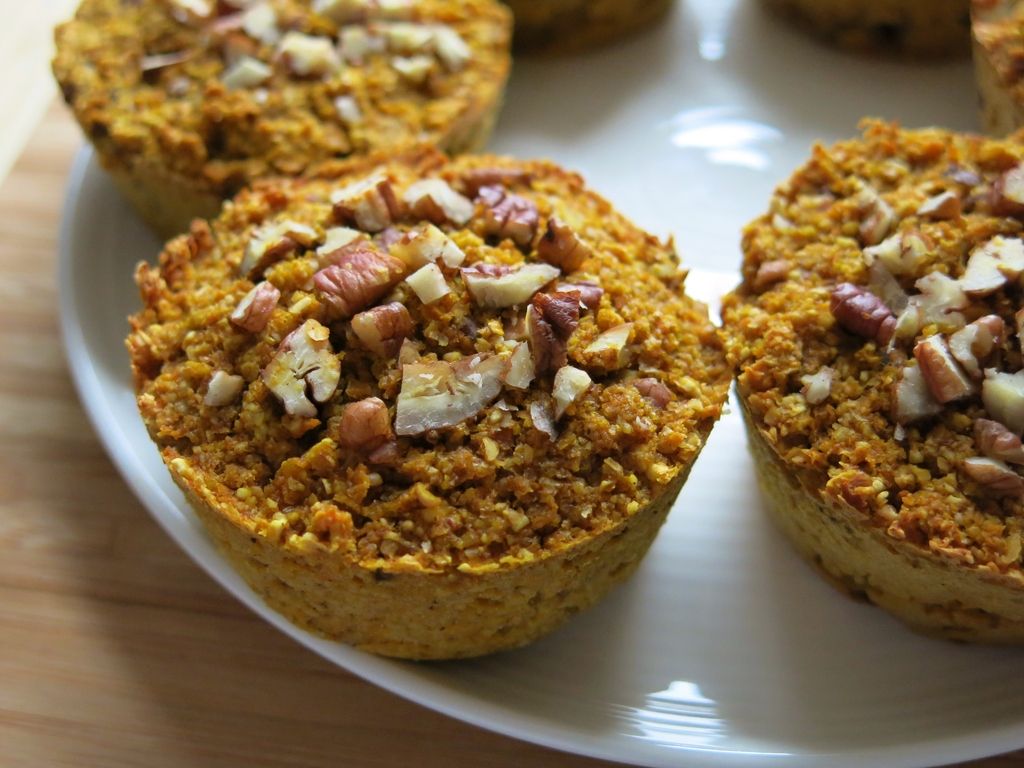
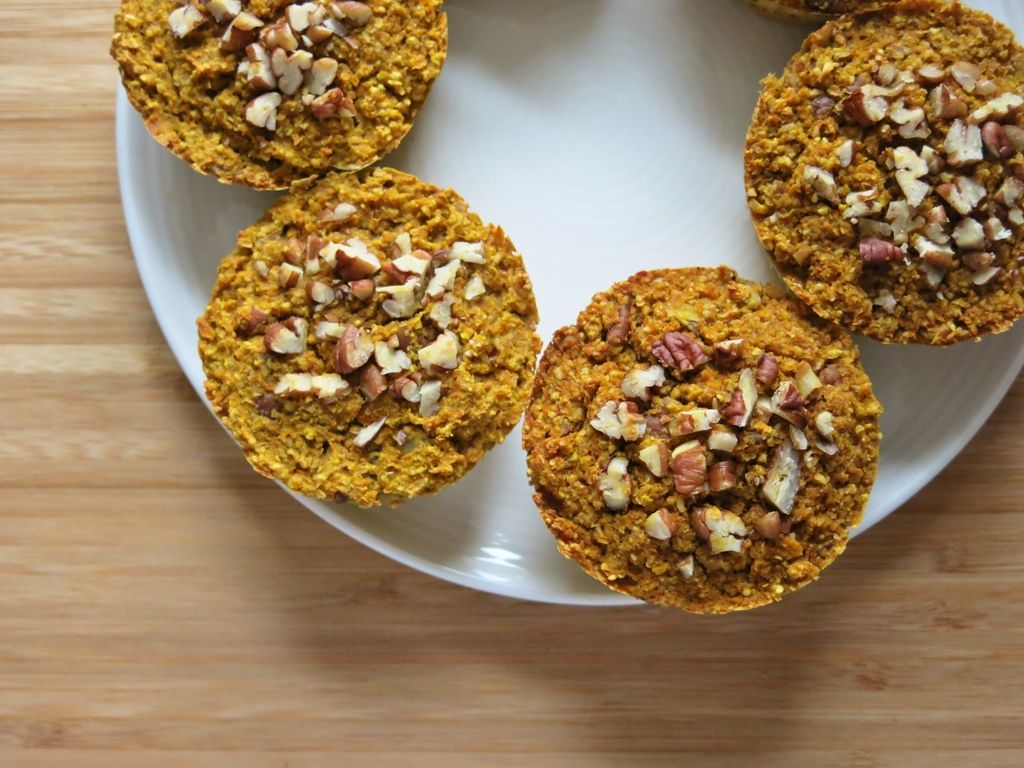
Pumpkin pecan muffins

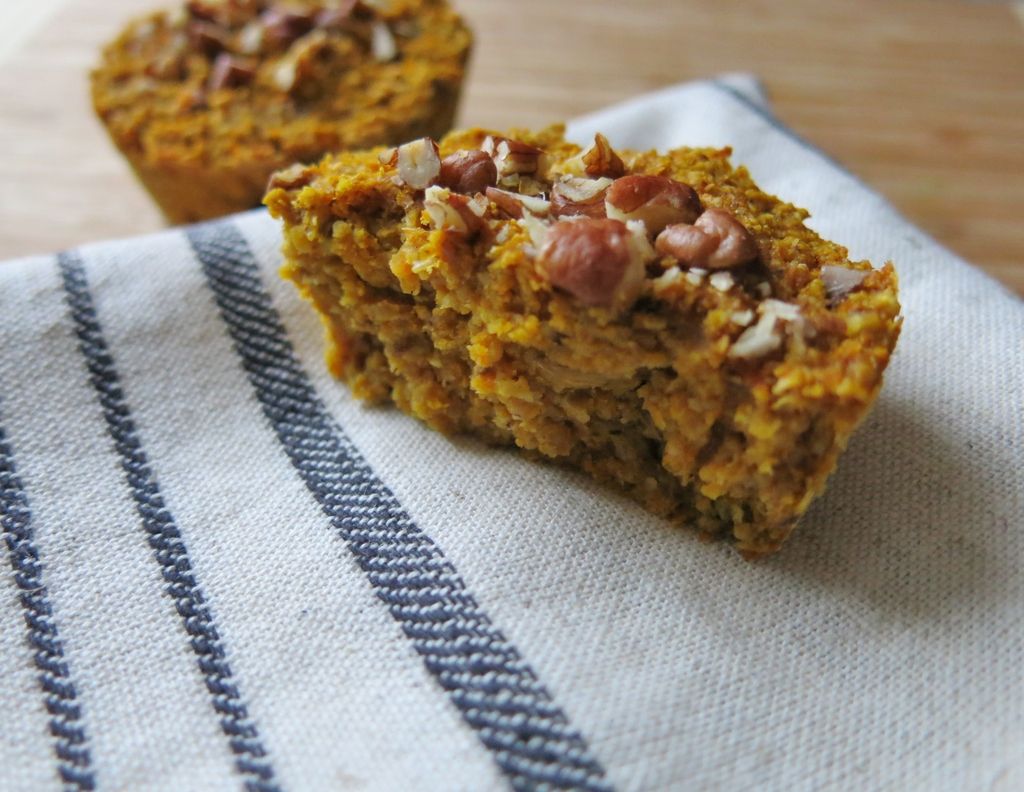
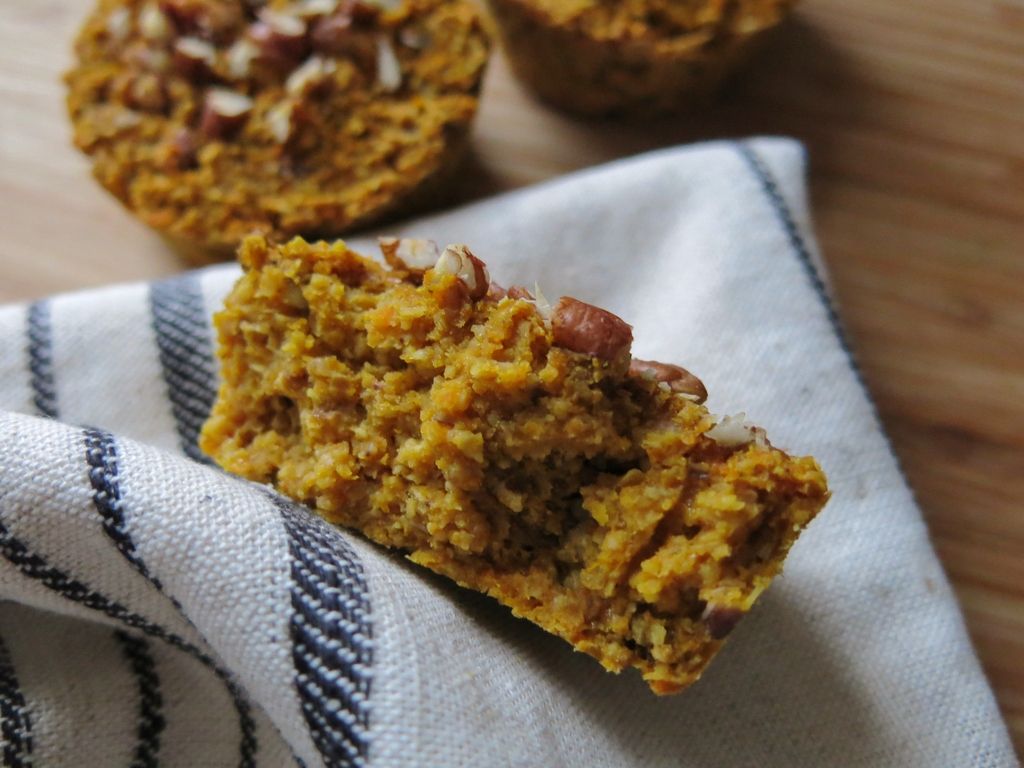
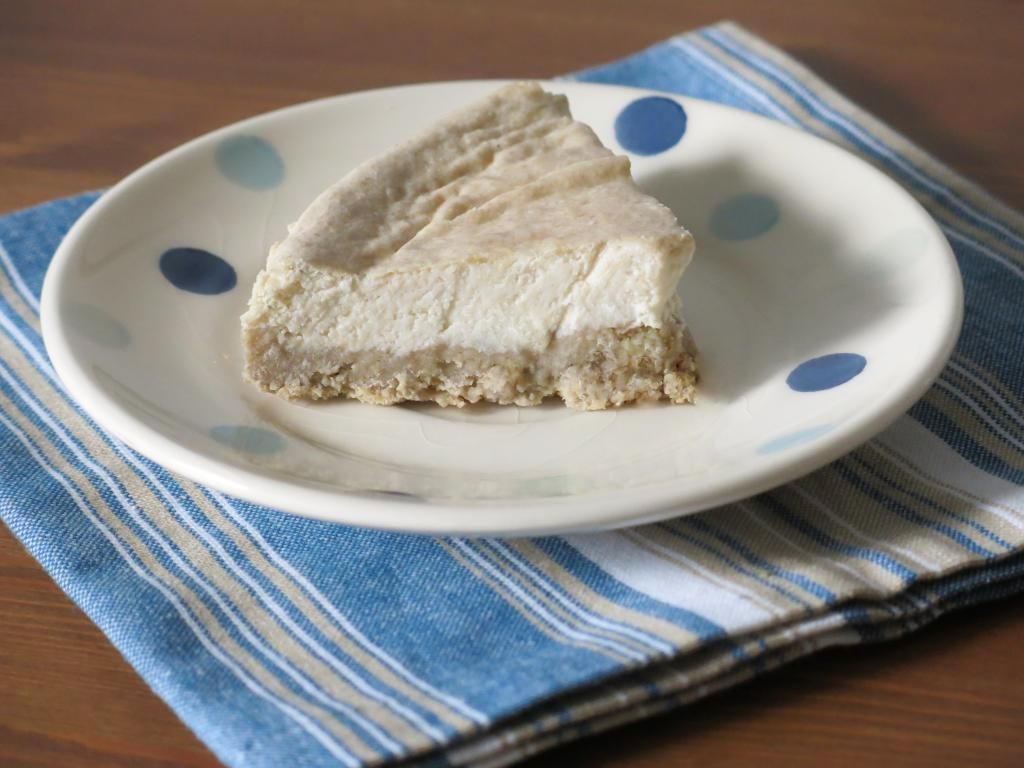
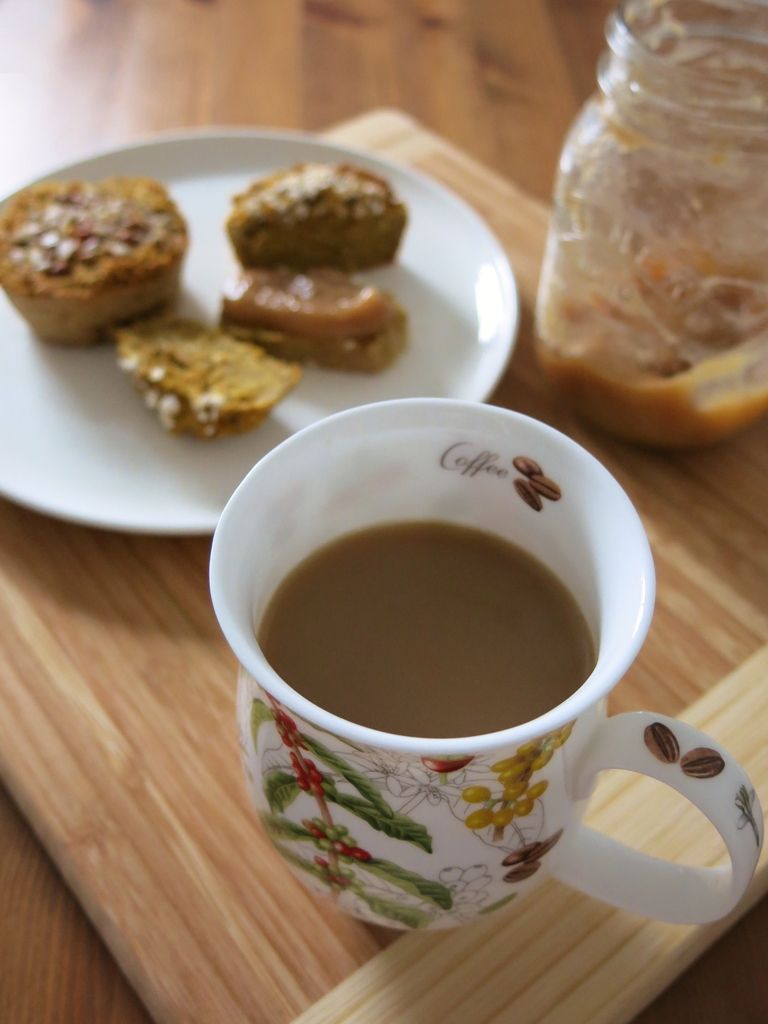
I have baked several batches ahead from a huge squash and honestly, throughout the week the thought of having these little guys waiting for me in the kitchen made me want jump out of the bed in the morning! :) I put on my little bialetti espresso pot on a stove, jumped to a quick shower and once I was done, the breakfast was ready! These go very nicely with lots of things: berries, apples and persimmons, apple & pear puree ( recipe's coming soon), and if you can tolerate dairy you can pair them up with low fat cottage cheese. One word: YUM!

These are man-approved too! I packed them in a clip lock box for my husband to take to work and he ate his 3 day supply in one sitting. Says it all.

Why Pumpkins and Squashes?

As to the health benefits: these guys are indeed little heroes! First of all, they are very low in carbohydrates, so can be enjoyed safety as a part of any weight loss and weight management eating plan. Secondly, they are an excellent source of minerals, vitamins and antioxidants that maintain health of our eyes, skin, brain, nervous system, bones, blood and even slow down premature aging.  They also have very powerful immunity boosting properties - very thoughtful of mother nature in these cold (and somewhat gloomy) months!

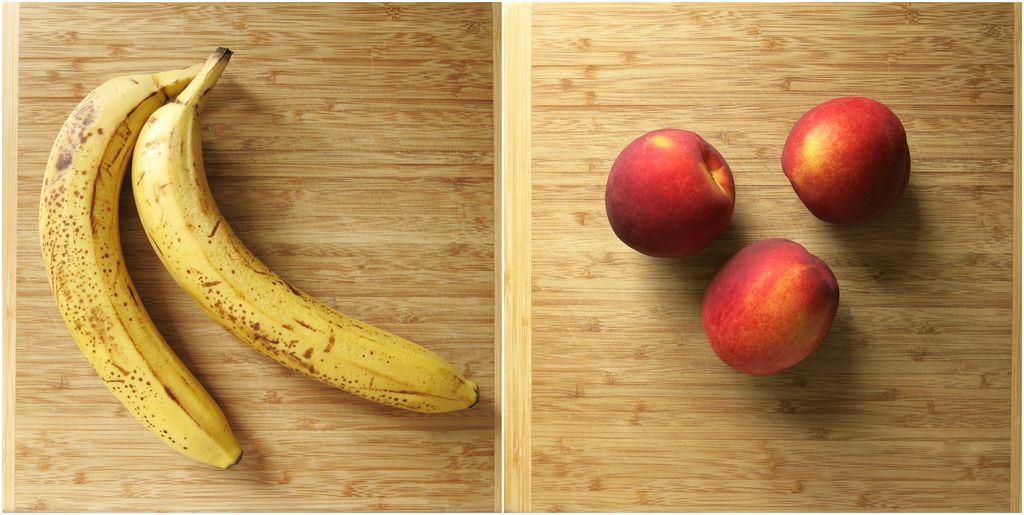
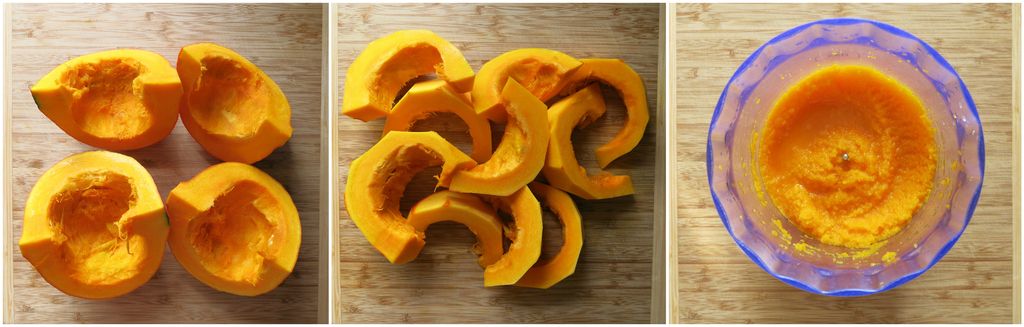
Oh, and by the way! Instead of a pumpkin I've used to make these muffins a kuri squash, which is the most delicious winter squash type I've tasted so far! Highly recommend, but you can use any other squash or pumpkin of your preference. (Let me know in the comments which is your favourite!)

Ingredients:
(Makes 6 medium size muffins) 

275g puree of pumpkin or quash of your choice
♥ a) 150g porridge oats or b) for flourless, lower carb and higher fibre version 130g oat bran (beneficial for blood sugar level control)  
♥ a) for vegetarian version: 1 free range organic egg or b) for vegan version: 1 tablespoon ground flax seeds mixed with 3 tablespoons of filtered water or 1/4 cup unsweetened applesauce 
♥ 1 teaspoon ground cinnamon
♥ 3/4 teaspoon all spice
♥ 1/2 teaspoon of cloves (optional)
♥ 1/2 teaspoon of baking soda and few drops of organic apple cider vinegar
♥ 1/4 teaspoon baking powder
1 1/2 teaspoon stevia
♥ 1 or 2 tablespoons of oat or almond milk (optional, just in case if your mixture comes out too dry)
♥ a) 45g pecans (skip if you're allergic to nuts) or b) 1 1/2 tablespoon oat flakes for sprinkling on top
♥ silicone 6 cup muffin mould

Method:

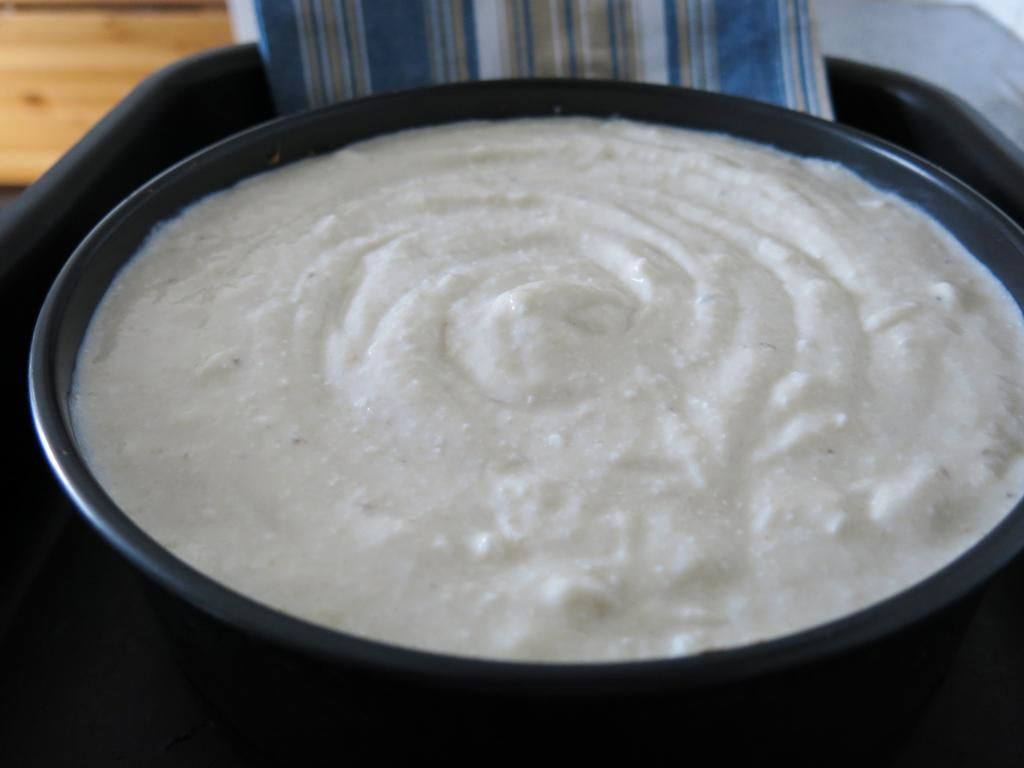
1. Make a puree. Simply cut squash slices into smaller pieces, throw them into a chopper, food processor or blender, added some filtered water and puree until smooth.


2. If you will be using porridge oats, ground them in blender, food processor or chopper until the reach a flour consistency. Alternatively, you can use oat bran for higher fibre content and a version that is low in carbs. There's no need to ground oat bran just in case. ;)
3. In a clean large bowl mix together all dry ingredients: oat flour (step 3 above) or oat bran, cinnamon, all spice, cloves (if using), baking powder, stevia and (if using) about 30g roughly chopped pecans (the remaining 15g will go on top). Mix everything well.
4. If you are using an egg: whisk it with a hand mixer until it becomes white and foamy. This will prevent muffins taste or smell like eggs. Just a little trick. ;)
5. Add pumpkin/squash puree to the whisked egg or, if you are making vegan muffins, ground flax seeds mixed with water or applesauce. Stir the mixture well.
6. Take 1/2 teaspoon of baking soda and add a few drops of apple cider vinegar. The soda will start to bubble and foam. Don't be alarmed, this is what supposed to happen. Count to 8 and stir it in the pumpkin puree.
7. Add dry ingredients to the wet and mix everything well. If the mixture looks too dry, add 1 or 2 tablespoons of oat or almond milk.
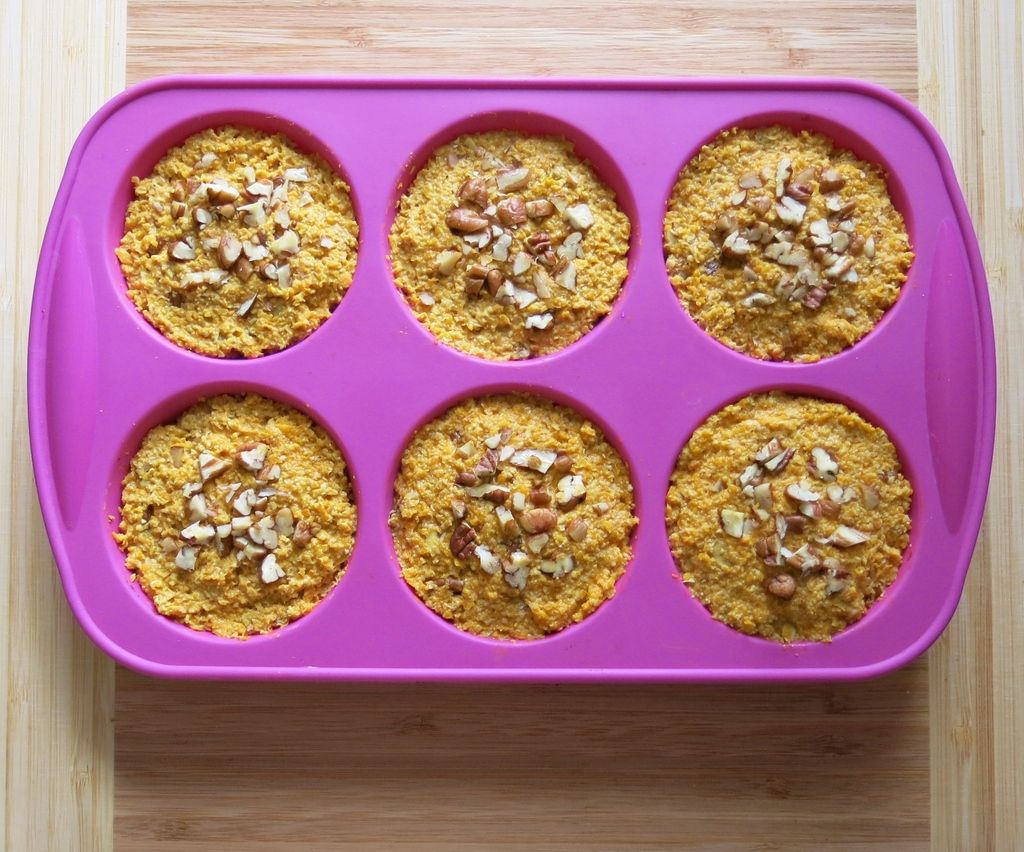
8. Distribute the mixture equally between 6 muffin cups. Even out and from the top press each one gently with a tablespoon.
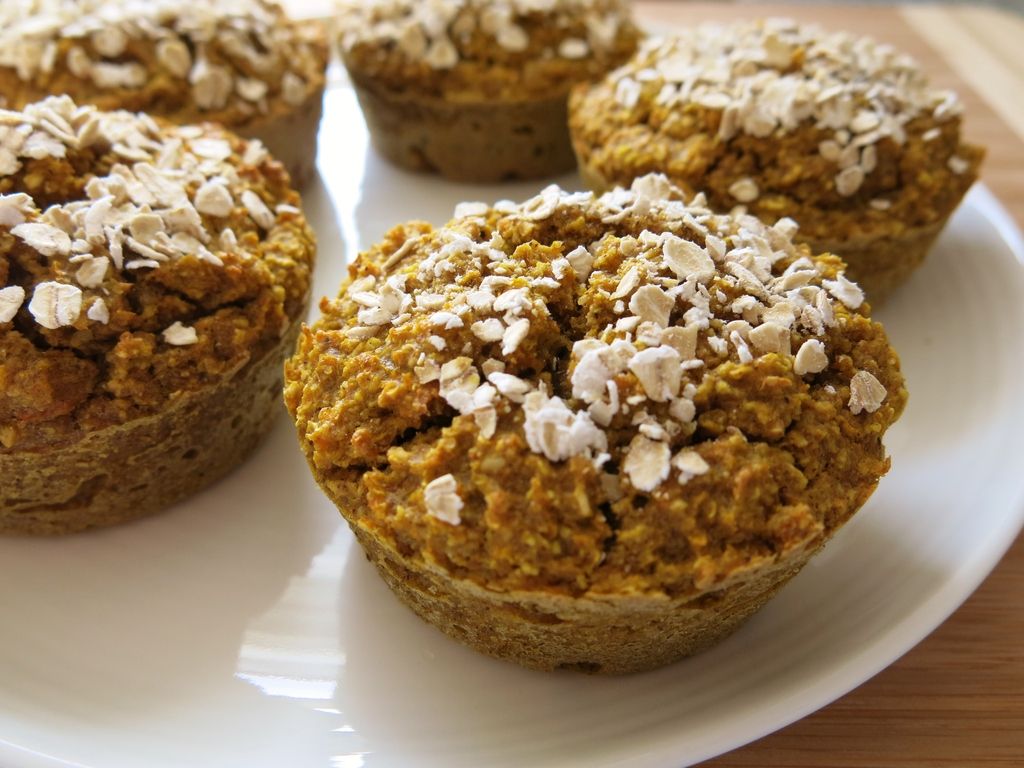
9. Sprinkle the remaining 15g of chopped pecans on top. If you're making the nut-free version, sprinkle oat flakes on top. Whatever is your topping - press in down gently into the mixture with your clean fingers. This will prevent the topping from falling down.

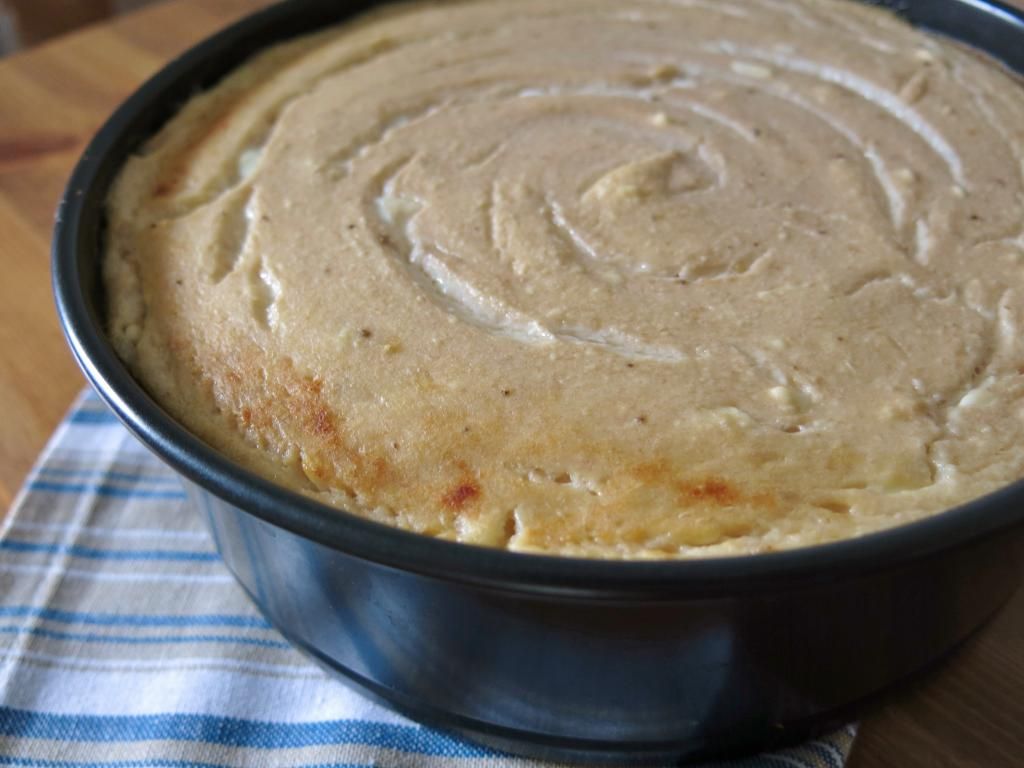
Ready to go to the oven.

10. Bake for 25 minutes at 170C or until a toothpick inserted in the center comes out clean.
11. Take the tray out of the oven and allow to cool before removing muffins from the muffin mould.
12. Enjoy!

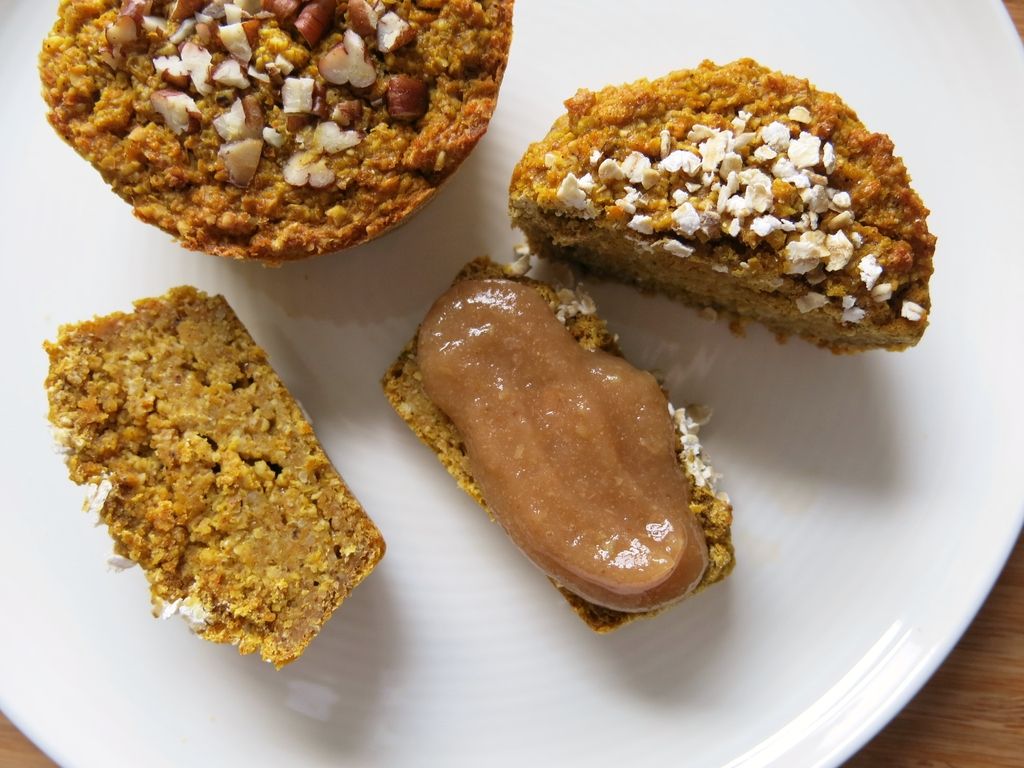
Pumpkin muffin with apple & pear puree
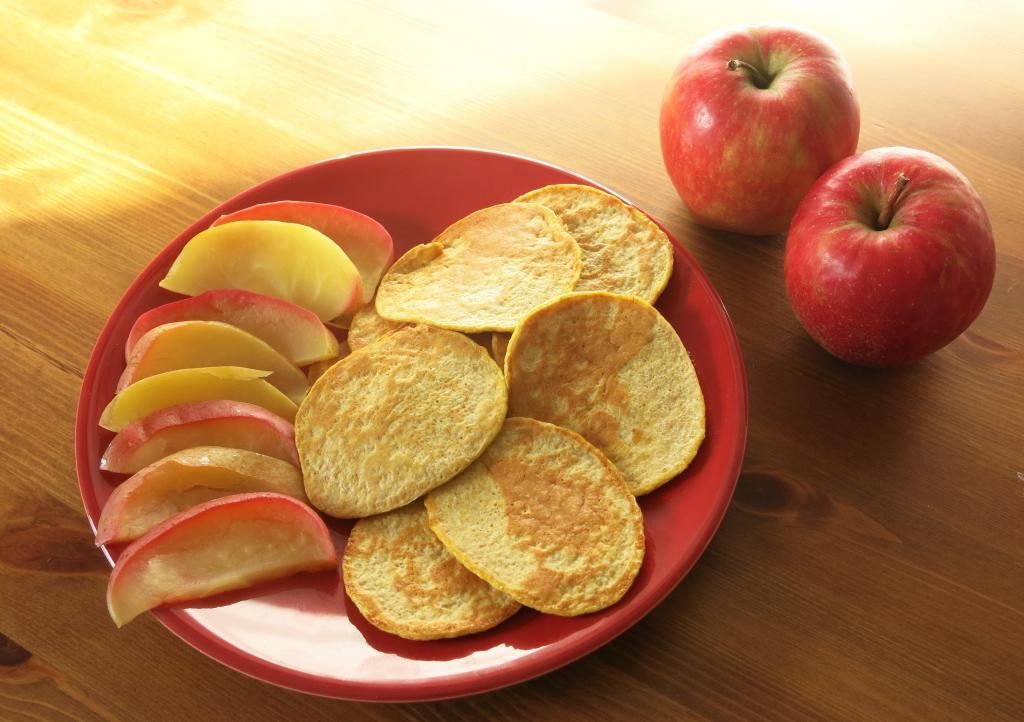
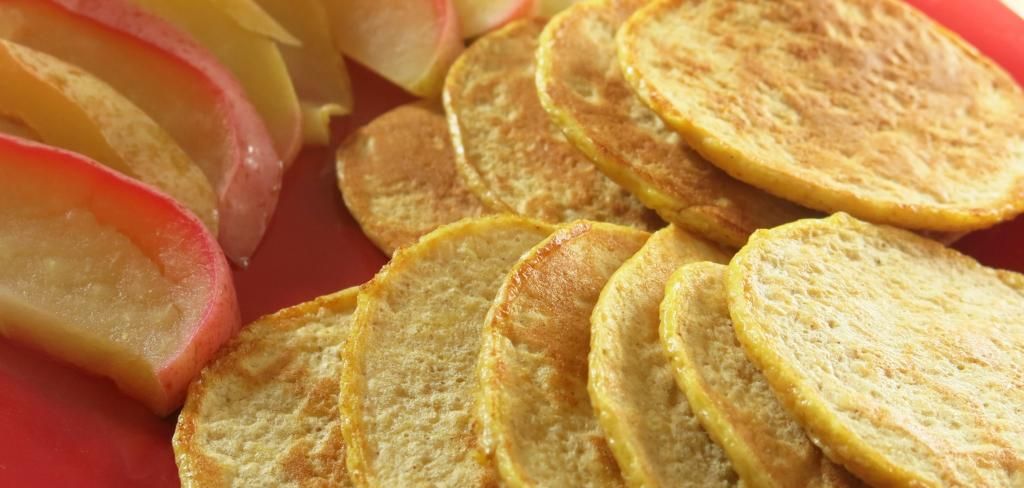
Ingredients:
(makes approx 23 small pancakes)

The Perfect Banana Bread - Vegan, Fat-Free, Wheat-Free, Nut-Free

Sunday 13 September 2015

As the days are getting colder, it's a perfect time to get baking! I've been experimenting with making banana bread several times before posting this recipe to make sure the proportions are perfect. Also, the challenge was to make my banana bread as healthy and as guilt-free as possible as opposed to so many recipes out there overloaded with fat or made of wheat flour. But now with each bite of a flavorsome, fluffy, perfectly moist slice of this banana bread, I get more and more proud that I finally nailed it! I decided to make it fruity and added nectarines, also because I love them a lot! But you can also take peaches or small apples of your choice instead.


For those who never tried or not familiar with banana bread, this is not strictly a bread that you have with soup or to make a sandwich. :) Banana bread is rather a moist pie/cake to go with your morning coffee or tea. You can spread peanut butter or blend of few strawberries and quark (fat-free cottage cheese) on top of it, or just have it on its own. Best served, chilled.


INGREDIENTS:
(makes a loaf approx. 22.5cm long and 10cm wide)

♥ 270g wholemeal buckwheat flour
♥ 300g mashed overripe bananas (peeled weight)
♥ 3 nectarines (or medium size apples)
1 teaspoon baking powder
3/4 teaspoon baking soda
1/2 teaspoon salt
♥ 1 teaspoon cinnamon, plus some for dusting
♥ 4 tablespoons of filtered water


METHOD:
1.  Pre-heat your oven to 200 degrees Celsius.
2.  Mash peeled bananas with a fork or puree in a blender. Add water before doing so.
3.  In a separate bowl, mix buckwheat flour, baking powder, baking soda, salt and cinnamon.
4.  Finely (or not so finely:)) dice 2 nectarines and put them into a bowl with dry ingredients.
5.  Add pureed bananas to dry ingredients with diced nectarines and combine everything well.
6.  Make 15-17 slices of nectarines.
7.  Pour your mixture into a silicone loaf mould . Top it with nectarine slices and sprinkle ground cinnamon as much as your want.
8.  Turn the temperature down to 180 degrees Celsius and put the banana bread inside the oven.
9.  Bake at 180 degrees Celsius for 60 - 65 minutes.
10.  Let cool for 15 minutes before taking the bread out of the loaf mould.
11.  Before slicing and serving, let the bread cool completely for a couple of hours.

Enjoy! xx


Delicious and Healthy Granola Bars ♥

Thursday 12 February 2015


By far the best recipe I've tried! I started making these granola bars as a healthy snack that is high in fibre and is free from trans fats and refined gunk. Turns out with time I became so advanced at making these yummy bars, that they may well become your next healthy dessert alternative! Here's the ingredients list and the method that will make you say: "Mmmmm!"...
I'll also share with you a secret how to make your granola bars either crunchy or soft and chewy depending on you like.

PHOTOS OF DRY & CRUNCHY GRANOLA BARS


PHOTOS OF SOFT & CHEWY GRANOLA BARS


 INGREDIENTS:
(Makes approx. 16 bars) 

♥ 70g organic unsalted butter (or 3 tablespoons of coconut butter for vegan version)
♥ 115g organic rolled oats ground to a flour texture
♥ 150g organic whole rolled oats
♥ 100g whole hazelnuts
♥ 260g mashed ripe bananas (roughly equals 2 medium and 1 large bananas)
♥ 100g organic prunes and dried apricots
♥ 30g honey or 50g brown sugar (or 1,5 tbsp of stevia for a version much lower in sugar)
♥ 1/4 tsp vanilla powder
♥ 1 tsp ground cinnamon
1 tsp vanilla powder

DIRECTIONS:

1. Preheat the oven to 180°C degrees.

2. In a chopper or food processor blitz 115g of rolled oats until flour texture. Transfer ground oats to a large bowl, add ground vanilla, cinnamon and stevia. (I normally go for stevia to keep my blood sugar level under control). Take time to mix everything well.


3. Add chopped dried fruit, crushed nuts and whole rolled oats. Mix well.

4. In a food processor, chopper or blender puree bananas with coconut butter if you're using one.

5. If you're using dairy butter, then at this point put butter onto an oven-safe bowl or baking tray and place it into the oven for approximately 2 minutes until the butter melts. (skip this step if you are using coconut butter)

6. While your butter is melting, take a large spoon and start mixing banana puree with the dry ingredients in your large bowl. 

7. If using dairy butter, take out the melted butter and stir it in your mixture. Stir everything thoroughly.

8.  Time to choose your granola texture!
FOR DRY & CRUNCHY GRANOLA BARS:
If you want your granola bars to be crunchy, take non-stick baking paper and line a baking tray with it. Transfer the mixture onto the baking paper and with your clean hands form a log. Mine is usually about 21 cm long and 9,5 cm wide and 2,5 cm high. But you can make it as long, wide and thick as you like. After all these are your bars! ;)
FOR SOFT & CHEWY GRANOLA BARS:
If you want your granola to be almost like a pie, take a silicone bread loaf mould, transfer the mixture into it and even out the top with a back of a tablespoon.

9. Bake for 20-25 minutes until light golden. If you prefer DRY & CRUNCHY granola bars, bake for 30 minutes.

10.  
FOR DRY & CRUNCHY GRANOLA BARS:
Take your log out of the oven and while it's on the tray cut it into bars using a sharp knife. Leave to cool before removing.
FOR SOFT & CHEWY GRANOLA BARS: 
Take out your bread mould and allow to cool on baking or greaseproof paper for at least 15 minutes. Transfer onto a chopping board and using a sharp knife cut into bars.

11. For longer life, store granola bars refrigerated in an airtight container.

ENJOY! xx

INGREDIENTS:
♥ 80g of cooked buckwheat (preferably organic)
♥ 2 organic free range eggs
♥ Sprinkle of cinnamon
♥ Optional: 1/4 tsp of salt - See more at: http://nataliasfruitycorner.blogspot.co.uk/search/label/Healthy%20Recipes#sthash.boi03BLi.dpuf
INGREDIENTS:
♥ 80g of cooked buckwheat (preferably organic)
♥ 2 organic free range eggs
♥ Sprinkle of cinnamon
♥ Optional: 1/4 tsp of salt - See more at: http://nataliasfruitycorner.blogspot.co.uk/search/label/Healthy%20Recipes#sthash.boi03BLi.dpuf
INGREDIENTS:
♥ 80g of cooked buckwheat (preferably organic)
♥ 2 organic free range eggs
♥ Sprinkle of cinnamon
♥ Optional: 1/4 tsp of salt - See more at: http://nataliasfruitycorner.blogspot.co.uk/search/label/Healthy%20Recipes#sthash.boi03BLi.dpuf
INGREDIENTS:
♥ 80g of cooked buckwheat (preferably organic)
♥ 2 organic free range eggs
♥ Sprinkle of cinnamon
♥ Optional: 1/4 tsp of salt - See more at: http://nataliasfruitycorner.blogspot.co.uk/search/label/Healthy%20Recipes#sthash.boi03BLi.dpuf
INGREDIENTS:
♥ 80g of cooked buckwheat (preferably organic)
♥ 2 organic free range eggs
♥ Sprinkle of cinnamon
♥ Optional: 1/4 tsp of salt - See more at: http://nataliasfruitycorner.blogspot.co.uk/search/label/Healthy%20Recipes#sthash.boi03BLi.dpuf
INGREDIENTS:
♥ 80g of cooked buckwheat (preferably organic)
♥ 2 organic free range eggs
♥ Sprinkle of cinnamon
♥ Optional: 1/4 tsp of salt - See more at: http://nataliasfruitycorner.blogspot.co.uk/search/label/Healthy%20Recipes#sthash.boi03BLi.dpuf

Italian Biscotti with Almonds and Orange Zest - The Healthy Way ❤

Friday 2 January 2015


Ah, the tempting smell of fresh baked Italian biscotti... But if you're watching your weight, white refined flour or sugar (main biscotti ingredients) are exactly the products you need to stay away from. And here's more to motivate you - these products have a very bad influence on you health. Increased blood sugar affects your glands and significantly worsens your mood (hello depression, moodiness, grumpiness, irritability and PMS!). Whereas, white flour delays elimination of waste material in the body and disrupts normal digestion. Now to the good news! What I did the other day has been one of the most successful culinary experiments I've made! I'm so excited  and happy to share with you a recipe of an absolutely delicious Italian biscotti made the HEALTHY way! Warning: it may well be the best biscotti you've tasted! ;)


INGREDIENTS:

♥ 230g of organic rolled oats (I used these - http://tidd.ly/bd384a14) finely ground in a coffee grinder or chopper to make them almost flour-like
♥ 2 large organic free-range eggs
♥ 100g almond flakes. Alternatively, you can toast whole almonds for 8 minutes in an oven, let cool and coarsely chop.
♥ A zest of 1 organic orange, finely chopped
♥ 1 tsp vanilla powder
♥ 1 tsp baking soda slaked with vinegar (just pour few drops of vinegar onto a teaspoon with baking soda to make a fizzy mixture) or baking powder
♥ 1/5 cup organic agave nectar (http://tidd.ly/bfdd22dc) or honey.
(You can also use stevia (http://tidd.ly/fdc3196), but each brand has its own conversion equivalent)
♥ 1/4 tsp salt
♥ Non-stick parchment paper (http://tidd.ly/1652d27a)
♥ Optional: 1 tsp almond extract
♥ Optional: 1 tbsp rum or cognac (for adults only)

DIRECTIONS:

1. Pre-heat oven to 180°C degrees.
2. Beat eggs and agave nectar or honey with a mixer for about 5 minutes until they become thick and white.
*3. Optional: Add almond extract and/or cognac or rum.
4. Add flaked or chopped almonds. Gently stir the mixture with a wooden spoon.
5. In a separate large bowl mix ground oats, salt, vanilla powder and chopped orange zest. Finally, add baking soda.
6. Combine egg mixture (described in steps 2-4) and oats mixture (described in step 5). I find it most helpful to do it with a large table spoon and finish with my clean bare hands.
7. Transfer your mixture onto a baking tray covered with non-stick parchment paper and form a log. Usually, it is recommended to make it approximately 30 cm long and 9 cm wide (your biscotti will expand in size a bit during baking).
8. Bake for about 25 minutes until your biscotti log becomes firm. Don't worry, it does not need to be 100% solid yet.
9. After 25 minutes, take your biscotti log out of the oven and let it cool for about 8-10 minutes.
10. Carefully transfer your log onto a chopping board. Reduce your oven temperature to 160°C. Using a sharp knife cut your log into 2cm thick slices. Carefully put your biscotti flat on their widest part on the parchment paper and bake for another 10* minutes.
11. Turn biscotti over and bake for another 10* minutes.
12. Let cool and enjoy!

* This time hugely depends on the air humidity and that's why it will take longer for biscotti to become dry. So your best bet is to put a timer on 10 minutes first and then to regularly check you biscotti and leave them bake longer if necessary. 

With Love,
Natalia

Vegan Peanut Butter Rum Balls a.k.a Chocolate Little Snowball Cakes

Tuesday 30 December 2014

No Christmas or New Year's Eve table goes without a delicious dessert. This year I upgraded my family's all time favorite dessert to a healthier level  - less sugar, saturated fats, refined grains but still keeping the taste rich and festive. And it's vegan!


This cake has a funny name with Russians - a "potato" cake. It used to be a very popular and somewhat posh dessert in USSR.  I still remember a morning at the cafe when I was 5 and my mom bought it to me the first time. My taste buds literally dancing! :) I first surprised my parents by making a traditional version of "potato" cakes when I was 18 and since then all my family requests them for special occasions, like birthdays, Easter, New Year's Eve and so on. By now, I know just how explosive the ingredients combination is for our body, so I was pondering how to replace those ingredients with something more healthy. The result was welcomed with approval, so here's a recipe to surprise your loved ones! ;)

I must only remind that although it is a healthier version, this still is a dessert and so should be enjoyed only occasionally to keep your weight and health in tip top condition! ;)


INGREDIENTS:
(Makes 11 small balls):

♥ 170g of organic rolled oats finely ground in a coffee grinder or chopper to make them almost flour-like
♥ 50 ml organic oat milk
♥ 70g organic smooth peanut butter
♥ 1/2 cup agave nectar or honey
♥ 3 heaped tablespoons (or more depending on your to taste) of organic cocoa powder or you can melt 50g of 70% cocoa dark chocolate, which is what I did for the cakes pictured
♥ 1 tablespoon of almond extract
♥ 1 tablespoon of rum or cognac (skip if kids will eat these cakes too)
♥ 1 teaspoon vanilla powder
♥ Handful of organic dessicated coconut
♥ Half small banana sliced crosswise into 1.5 cm thick little coins

DIRECTIONS:

1. In a large bowl combine ground oats with vanilla powder and mix them well with a large table spoon.
2. Add agave nectar (or honey), almond extract, rum (or cognac) and mix well.
3. Stir in peanut butter and melted chocolate. This is the time to act quickly - mix in the ingredients well while the chocolate is still runny.
4. To finish up. I find that kneading with my bare (and of course clean!) hands. ;)
4. If the mixture is too dry, add a little bit of oats milk. If the mixture is too runny, don't worry - it will solidify a bit after some time.
5. Take 3 separate clean plates: 1st for dessicated coconut, 2nd for formed round balls and 3rd where these balls will go after being covered in coconut flakes (alternatively and airtight container is good too as it will keep them fresh longer).
6. Start forming cakes! :) I start with warming up the mixture in my hands to make a flat piece almost like for a cookie. I then take 1 banana coin, put it in the middle and roll the mixture into a round ball.
Once all your balls are ready, start rolling them in coconut and press them lightly to get coconut flakes stick better.
7. Refrigerate your ready cakes for a least 3 hours. If you can refrigerate them overnight, this is even better as they will soak in the flavors to the maximum.

Happy Holidays! ♥

Cinnamon Pancakes with Warm Apples - Wheat, Sugar and Dairy Free

Tuesday 21 October 2014


It is a beautiful autumn season when apples are most delicious, sweet and flavoursome. I absolutely love the taste when apple meets cinnamon and that's why this is one of my favourite recipes! These little pancakes are wheat, sugar and dairy free and are high in protein and fibre. They will keep you full until lunch and are perfect for a healthy start of a long working day! Magnesium and vitamin B12 will also help keep those autumn blues away by improving your mood and keeping you calm and happy. Also these pancakes pose no threat to your figure and help lose excess weight.
So now you have no excuse not to try them! :)

INGREDIENTS:
2 free range eggs
2 tablespoons of either coconut cream (http://tidd.ly/e8723d4b) or, if you eat dairy, organic plain low fat or fat-free yogurt (http://tidd.ly/d340d454)
3 tablespoons of organic oat bran
And here's a trick to get a delicious taste without adding sugar - 1/2 teaspoon of ground cinnamon (http://tidd.ly/2e62fc8a)
♥ Small organic apple of your choice or half a big one

DIRECTIONS:
♥ Core an apple and cut into 1-1.5 cm thick slices
♥ Put apple slices onto a pre-heated pan. Add 2 tablespoons of water, cover with a lid and leave on a low heat for 3 minutes. After that turn off the heat, but to keep apples warm leave them covered with the lid.


AND THE PANAKE MIXTURE:
Beat eggs with a fork just to blend whites and yolks together
♥ Add yogurt, oat bran and ground cinnamon and mix them all together


♥ Pre-heat a non-stick pan on a low heat. Add a teaspoon of olive oil and using a spatula spread it quickly over the pan
♥ Now it's time to transfer mixture onto a pan! I use a tablespoon to form small pancakes, usually 1 tablespoon gives 1 pancake.
♥ When the top of a pancake start to lose moisture (usually around after 3 minutes as we are frying on a very low heat), lift and quickly flip a pancake over. Leave for approximately another 1.5 minutes.
Serve with warm soft apples which you can also sprinkle with cinnamon if you like! :)


Enjoy and be healthy!
Love,
Natalia xx

Delicious Low-Fat Cheese Cake [wheat-free and refined sugar-free!]

Friday 21 March 2014

This light baked cheesecake has won a golden medal in my family! Being low fat yet nutritious and filling, not too sweet and not too sour, having soft texture and delicious flavors - all of that makes it a perfect breakfast idea. It is a safe dessert alternative for those who watch their weight, follow a low-sodium diet, healing a stomach from gastritis, have irritated stomach lining or other abdominal distress. And kids love this cake too!


I am happy to say straight away that preparation is very easy and no advanced or even intermediate baking skills are required!

INGREDIENTS:
♥ 500g of low fat cottage cheese or quark
♥ 4-5 large ripe bananas (4 for a thinner filling as on the second picture above)
♥ 130g of rolled oats
♥ Optional: 2-3 tablespoons of sugar-free low-salt peanut butter or cashew nut butter
♥ Optional: 1/2 tablespoon of vanilla powder
♥ Coconut butter to smear a baking tin

METHOD:
♥ Preheat an oven to 180C degrees.
♥ Very lightly smear the inside of your pie tin with a thin coating of organic butter or coconut butter (no margarine)

Cake base:
♥ Take a standard coffee mug of steel-cut or rolled oats (not 'easy-cook' or instant oats)
♥ 2 large ripe bananas
♥ Optional: If you don't suffer from nut allergies and if you are not prone to migraines - 2-3 tablespoons of organic sugar-free low-salt peanut butter. If you add peanut butter, you can safely reduce the amount of butter or coconut butter you smeared your pie tin with
♥ Process the base mixture in a chopper or anything else that does the same job - chopping and blending everything well together :) Any food processor will do! Here's a picture of the one that I use and it came within a hand blender set. By the way, it's better to process ingredients in parts if they don't all fit into your food processor's container at one time.
Hello, I'm a chopper! :)
♥ Now line the bottom of a pie tin with the base mixture ans smooth it out with the back side of a tablespoon. Bake it for 12 minutes.
♥ Clean the chopper or food processor's container as you'll need it again to make the filling.
♥ After 12 minutes have passed, take the cake base out from the oven and let it cool down a little. It need not be too soft of too crusty, just somewhere in between is perfect!

Cake filling:
♥ Take approx. 500 g of low fat organic cottage cheese
♥ 3 large ripe bananas (or 2 for a thinner filling, see 2nd picture from the top)
♥ Optional: 1/2 tablespoon of vanilla powder (if you can get it organic - that's great!)
♥ Blend it all together in a food processor. I just use my good old chopper you now are introduced with. :) In the UK cottage cheese usually comes a bit watery and grainy, so if you are using a dry/drained cottage cheese, you might want to add some water (about 7 tablespoons) or organic plain yoghurt or kefir, so that a consistency or your mixture resembles a pudding.

Raw mixture before cooking: 

♥ Pour the mixture over your base and bake for 30 - 35 minutes at 180C degrees.
♥ Take it out, let it cool until room temperature and then unclip the sides of your pie tin to serve.

You can also do a layered version with blueberries.❤


1. Bake your oats & banana cake base (instructions as above) for 10 minutes.
2. In a food processor or chopper process 140g of frozen or fresh blueberries with 80g of cashew nuts. The consistency should not be too watery, but should look rather like a thick yogurt. Pour the mixture over the base and bake it for another 20 minutes.
3. Follow the instructions above on how to make a cake filling and pour it over the blueberry layer. Bake for another 30-35 minutes. Let cool and enjoy! 

 Bon Appétit!

Simple Vegan Banana & Oat Cookies [High-Fibre, Low-Fat, Wheat-Free, Refined Sugar-Free]

Thursday 21 November 2013


Great as a morning nibble for you and your little angels (i.e. your kids! :))) )


INGREDIENTS: 
♥ 2 medium ripe bananas
1 mug of oats
♥ Dried fruit and seeds to taste
♥ Organic ground cinnamon or ground vanilla powder 
Organic coconut butter to brush the pan you'll be cooking with

DIRECTIONS:
STEP 1: Preheat the oven to 190C.
STEP 2: Puree bananas with a hand blender or chopper. Add dried fruit of your choice and blend lightly. Chopping dried fruit with a knife works just as well!
STEP 3: Stir in oats, seeds and either ground cinnamon or vanilla powder and mix everything well.
STEP 4: Grease your baking tray with coconut butter. Then using a tablespoon and your clean hands, form little flat cookies and put them one by one onto the baking tray.  Turn down the oven temperature to 180C and bake for 12 minutes.
STEP 5: Let them cool down on a plate and ENJOY!

And here's a picture of my favorite version made of dried figs and desiccated coconut:


With love,
Natalia xx